图像生成
了解如何使用 DALL·E API 中生成或操作图像。
注意: 如果您想在 ChatGPT 中生成图像,请前往 chatgpt.com。
介绍
Images API 提供了三种与图像进行交互的方法:
- 根据文本提示从头开始创建图像(DALL·E 3 和 DALL·E 2)
- 通过让模型用新的文本提示替换预先存在的图像的一些区域来创建编辑版本的图像(仅限 DALL·E 2)
- 创建现有图像的变体(仅限 DALL·E 2)
本指南涵盖了使用这些三个 API 端点的基础知识,并提供了有用的代码示例。要尝试 DALL·E 3,请前往 ChatGPT。
使用方法
生成
image generations 端点允许您根据文本提示创建原始图像。使用 DALL·E 3,图像可以具有 1024x1024,1024x1792 或 1792x1024 像素的大小。
默认情况下,图像以标准质量生成,但是当使用 DALL·E 3 时,您可以将 quality: "hd" 设置为具有增强细节的质量。正方形、标准质量的图像是最快生成的。
您可以一次请求 1 个图像(使用 DALL·E 3 通过并行请求请求更多)或最多 10 个图像(使用 DALL·E 2 与 n 参数)。
以下是一个使用 Python 生成图像的示例:
from openai import OpenAI

client = OpenAI()

response = client.images.generate(
  model="dall-e-3",
  prompt="a white siamese cat",
  size="1024x1024",
  quality="standard",
  n=1,
)

image_url = response.data[0].url
您可以在 API 代码库中了解 DALL·E 3 的新功能。
提示
与 DALL·E 3 的发布,模型现在接受默认提示,并自动重写它以进行安全性考虑,并添加更多细节(更具描述性的提示通常会导致更高质量的图像)。
虽然目前无法禁用此功能,但您可以使用提示来获得更接近所需图像的输出,方法是将以下内容添加到您的提示中:I NEED to test how the tool works with extremely simple prompts. DO NOT add any detail, just use it AS-IS:。
更新后的提示在数据响应对象的 revised_prompt 字段中可见。
DALL·E 3 生成示例
以下是一些使用 DALL·E 3 生成的图像示例:
| 提示 | 生成的图像 |
|---|---|
| A photograph of a white Siamese cat. |  |
每个图像可以作为 URL 或 Base64 数据返回,方法是使用 response_format 参数。URL 将在一小时后过期。
编辑(仅限 DALL·E 2)
也称为“inpainting”,image edits 端点允许您通过上传图像和掩码来编辑或扩展图像,掩码指示应该替换的区域。掩码的透明区域指示图像应该被编辑的位置,而提示应该描述新图像的全部内容,而不仅仅是被擦除的区域。此端点可以启用类似于 ChatGPT Plus 中的 DALL·E 图像编辑的体验。
以下是一个使用 Python 进行图像编辑的示例:
from openai import OpenAI

client = OpenAI()

response = client.images.edit((
  model="dall-e-2",
  image=open("sunlit_lounge.png", "rb"),
  mask=open("mask.png", "rb"),
  prompt="A sunlit indoor lounge area with a pool containing a flamingo",
  n=1,
  size="1024x1024"
))

image_url = response.data[0].url
以下是一些使用 DALL·E 2 进行图像编辑的示例:
| 原始图像 | 掩码 | 输出 |
|---|---|---|
 | 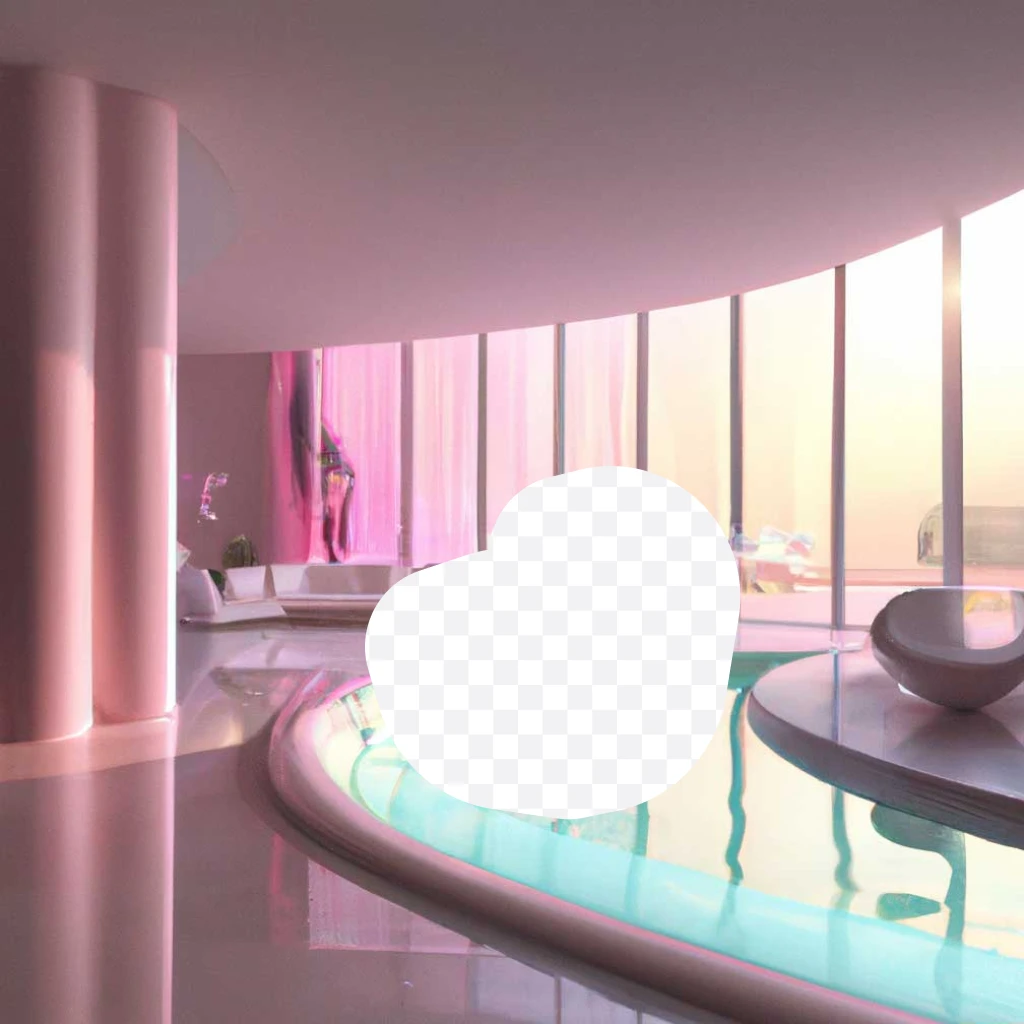 | 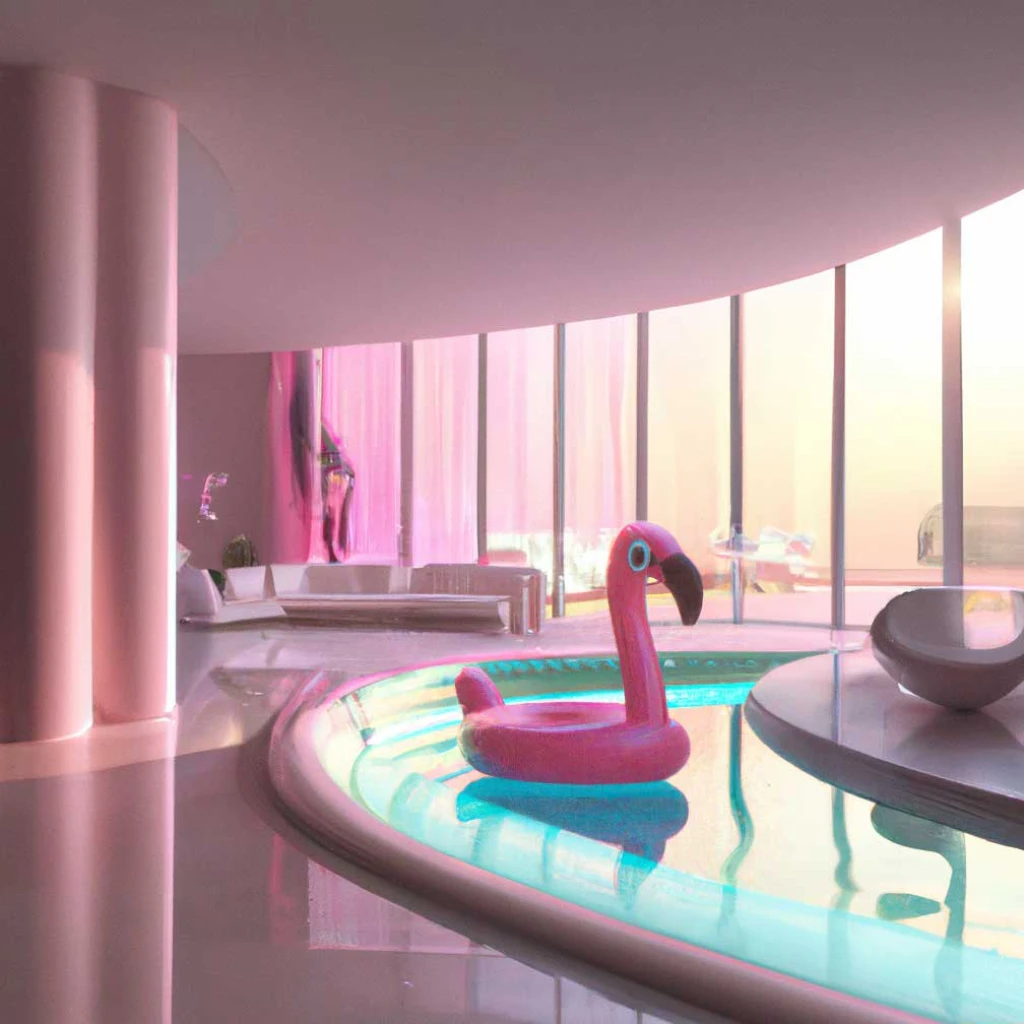 |
提示:一个阳光明厅的室内休息区,有一个带有火烈鸟的池塘
上传的图像和掩码必须都是小于 4MB 的正方形 PNG 图像,并且必须具有相同的维度。掩码的不透明区域在生成输出时不会被使用,因此它们不一定需要与原始图像相匹配,就像上面的示例一样。
变体(仅限 DALL·E 2)
image variations 端点允许您生成给定图像的变体。
以下是一个使用 Python 生成图像变体的示例:
from openai import OpenAI

client = OpenAI()

response = client.images.create_variation(
  model="dall-e-2",
  image=open("corgi_and_cat_paw.png", "rb"),
  n=1,
  size="1024x1024"
)

image_url = response.data[0].url
以下是一些使用 DALL·E 2 生成的图像变体的示例:
| 原始图像 | 输出 |
|---|---|
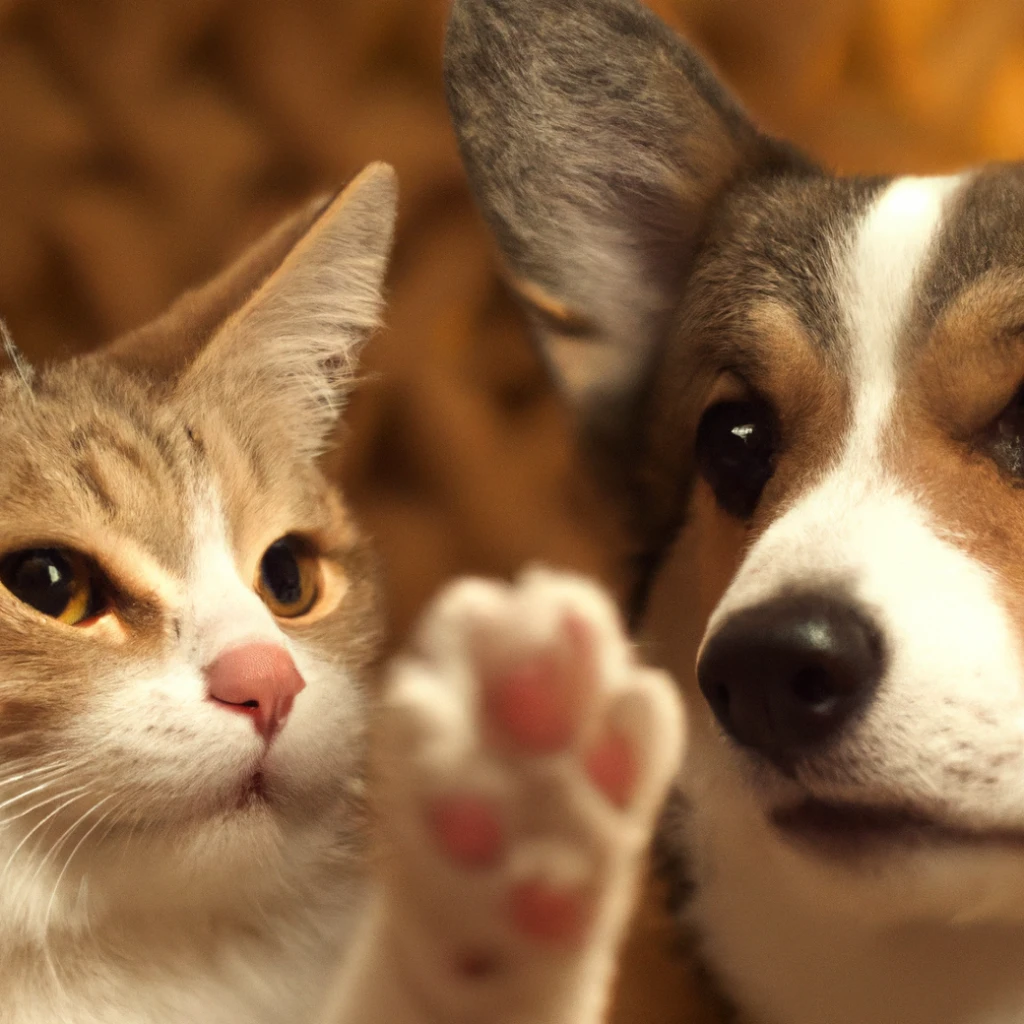 | 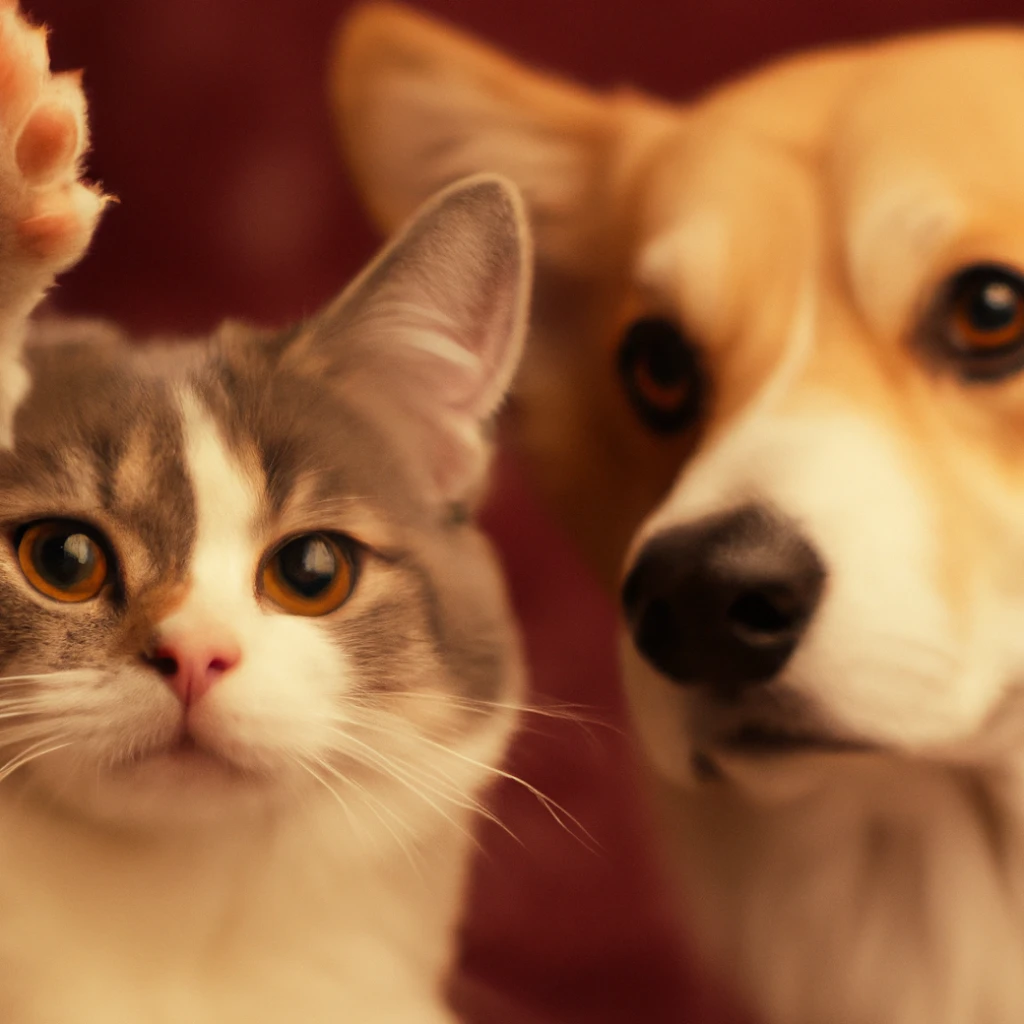 |
与编辑端点类似,输入图像必须是小于 4MB 的正方形 PNG 图像。
内容审核
提示和图像将根据我们的内容策略进行过滤,如果提示或图像被标记,则返回错误。
语言特定提示
使用内存中的图像数据
Node.js 中的示例使用 fs 模块从磁盘读取图像数据。在某些情况下,您可能会在内存中拥有图像数据。以下是一个 API 调用示例,该示例使用 Node.js Buffer 对象中存储的图像数据:
import OpenAI from "openai";

const openai = new OpenAI();

// This is the Buffer object that contains your image data
const buffer = [your image data];

// Set a `name` that ends with .png so that the API knows it's a PNG image
buffer.name = "image.png";

async function main() {
  const image = await openai.images.createVariation({
    model: "dall-e-2",
    image: buffer,
    n: 1,
    size: "1024x1024",
  });
  console.log(image.data);
}
main();
使用 TypeScript
如果您使用 TypeScript,可能会遇到一些图像文件参数的怪癖。以下是一个通过显式地将参数进行类型转换来绕过类型不匹配的示例:
import fs from "fs";
import OpenAI from "openai";

const openai = new OpenAI();

async function main() {
  // Cast the ReadStream to `any` to appease the TypeScript compiler
  const image = await openai.images.createVariation({
    image: fs.createReadStream("image.png") as any,
  });
  console.log(image.data);
}
main();
以下是一个类似的示例,用于内存中的图像数据:
import fs from "fs";
import OpenAI from "openai";

const openai = new OpenAI();

// This is the Buffer object that contains your image data
const buffer: Buffer = [your image data];

// Cast the buffer to `any` so that we can set the `name` property
const file: any = buffer;

// Set a `name` that ends with .png so that the API knows it's a PNG image
file.name = "image.png";

async function main() {
  const image = await openai.images.createVariation({
    file,
    n: 1,
    size: "1024x1024",
  });
  console.log(image.data);
}
main();
错误处理
API 请求可能由于无效的输入、速率限制或其他问题而返回错误。这些错误可以使用 try...catch 语句进行处理,而错误详细信息可以在 error.response 或 error.message 中找到:
import fs from "fs";
import OpenAI from "openai";

const openai = new OpenAI();

try {
  const response = openai.images.createVariation(
    fs.createReadStream("image.png"),
    1,
    "1024x1024"
  );
  console.log(response.data.data[0].url);
} catch (error) {
  if (error.response) {
    console.log(error.response.status);
    console.log(error.response.data);
  } else {
    console.log(error.message);
  }
}